
🩺Radare2
What is radare2?
Radare2 is an open-source reversing framework. It combines multiple tools together to help analyze a binary. I usually run it along with gdb to understand what a binary is doing (when we don’t have the source code 😄). The project's home page explains what the tool supports and how to install the same.
Here are some useful links:
Let’s get started
Lets get started by reversing a simple binary.
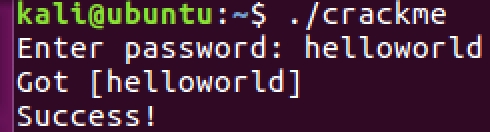
To create the binary follow the steps here using this source code. I tried this on Ubuntu, but should most likely work on any other Linux flavor. We can see that we failed to crack the password, the binary expects the password to match.
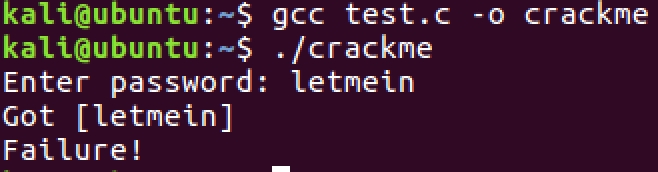
What do we do now to crack the password?
Step 1
Let’s start by analyzing the metadata of the file. This can be important for multiple reasons for example, for understanding if the binary is stripped (has no debugging symbols), ELF type, architecture, dynamic/static, protections, etc.
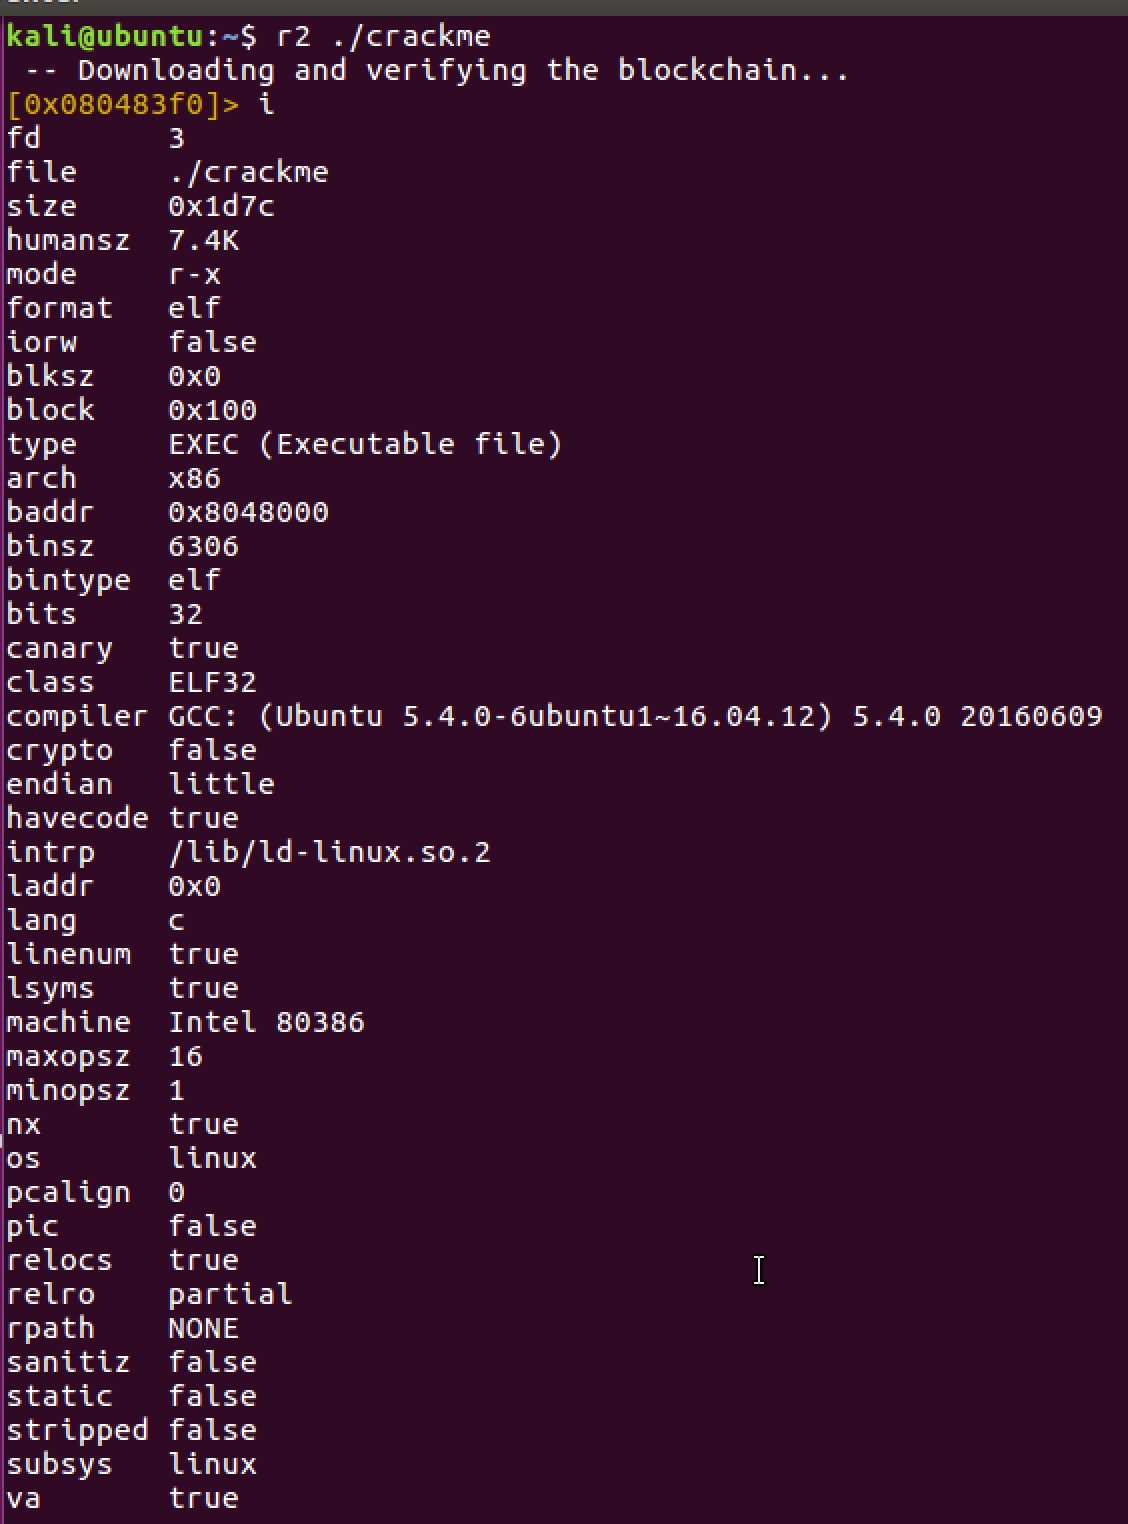
If we see above some protections like NX, canary, relocs, etc. have been enabled which is pretty standard for modern OS’es.
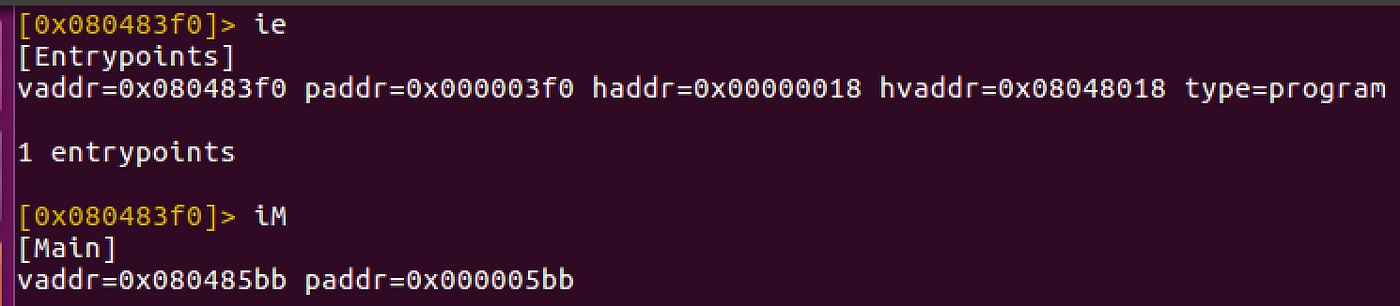
One can find the entry point of the binary using ie and main address using iM as below:
Also, the binary is not stripped.
Analyzing this information is important as binaries can have a lot of subtleties that can prevent one from debugging the same. Knowing the same will help us come up with workarounds around the protections. For now, it’s a pretty simple binary with standard protections.
Step 2
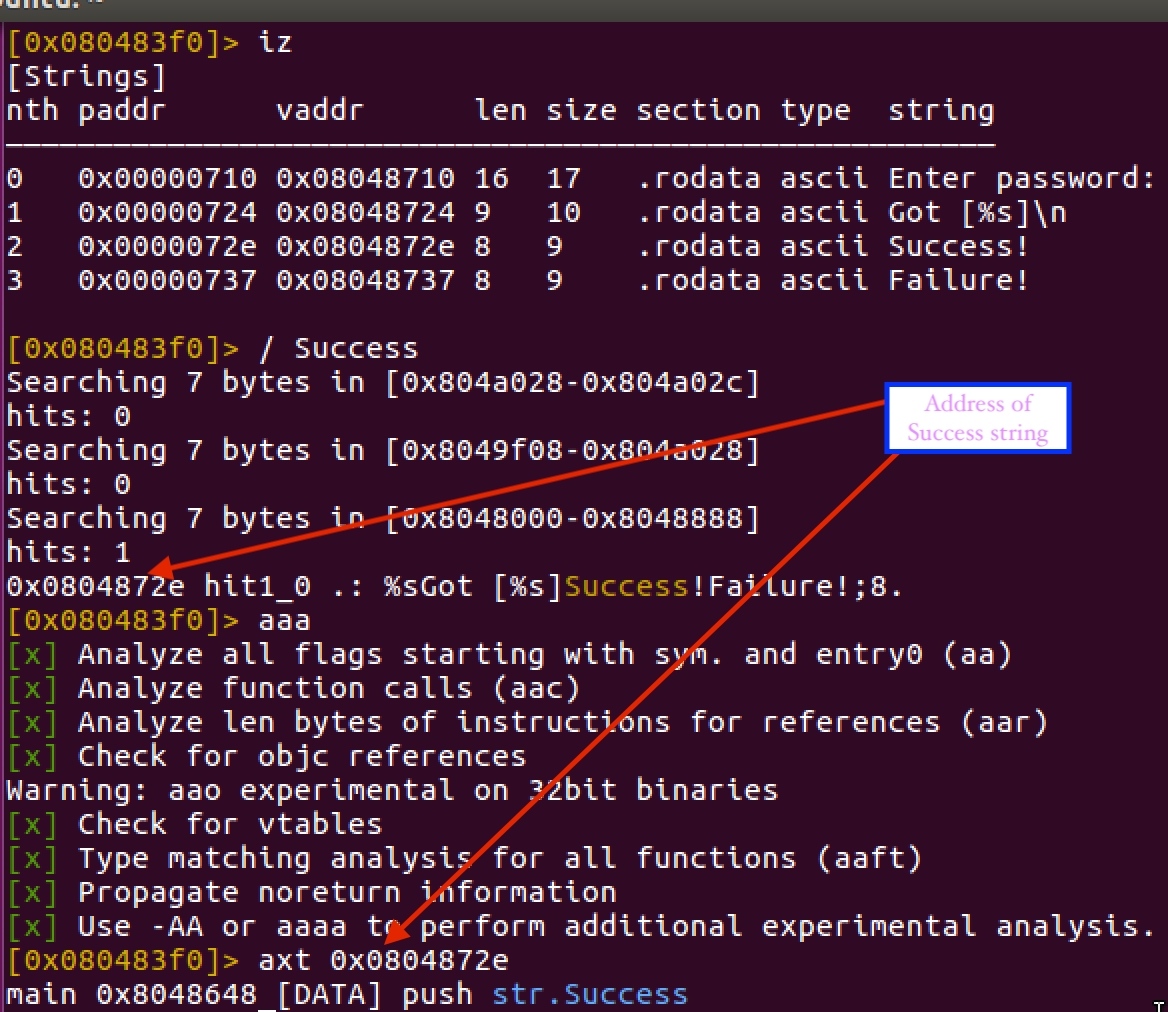
Analyzing strings can be important in binaries to find interesting pieces of code that we could disassemble and pay closer attention to. You can find the strings in the binary using the command iz
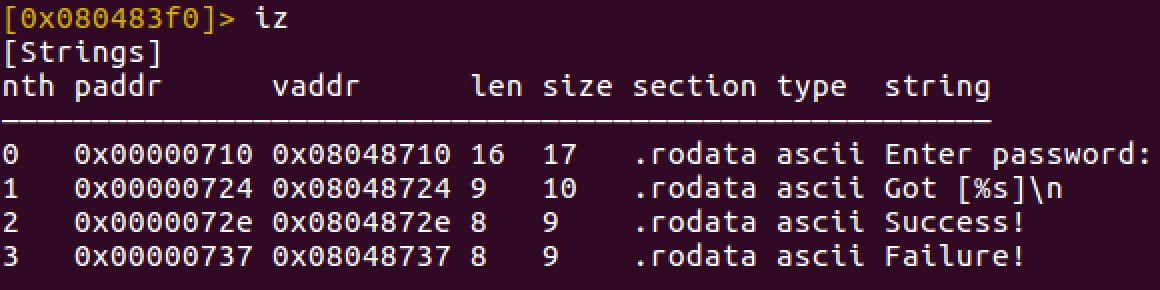
The strings here are straightforward. In a more complex example, they could be encrypted and not easily visible. Let’s note this down as we disassemble the binary.
Let’s say we would like to find where the string which contains Success is present in the binary we could run the below command. Note how we analyze the code using aaa and axt . The command axt allows us to see where the string is being referenced at.
Step 3
Let’s say we would like to find all functions being used in the binary. We could use the command aaa followed by afl as below
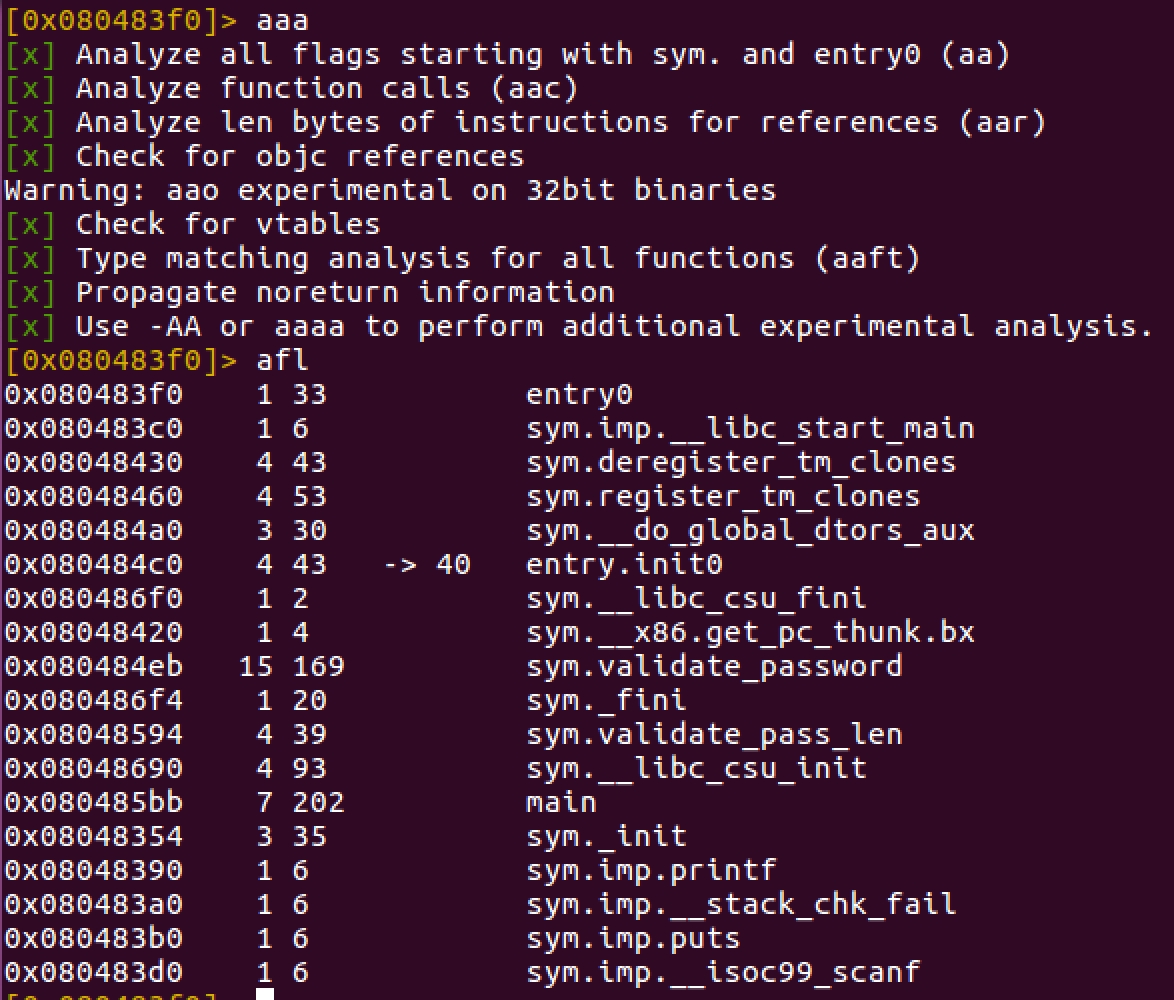
Most if not all of the functions with the namesym.imp* usually belong to internal libraries. Some interesting functions are sym.validate_password and sym.validate_pass_len
Now that we know the function names, let’s try disassembling them.
Step 4
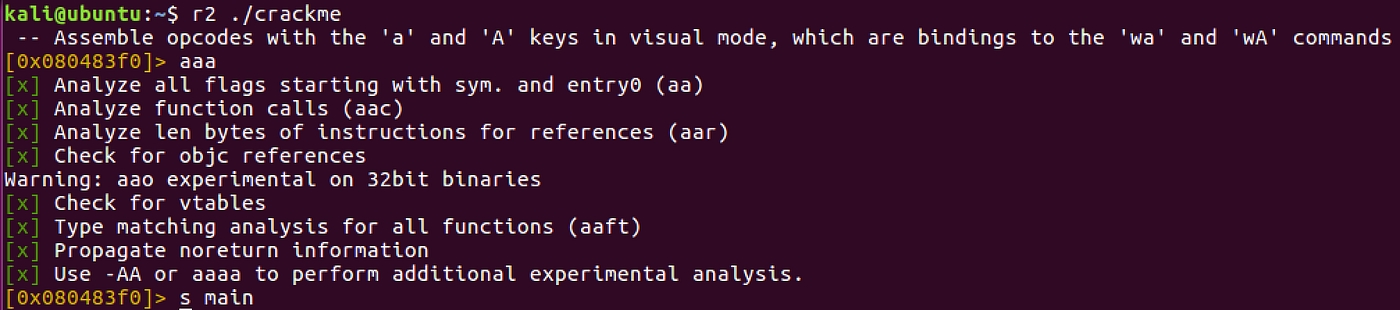
The main function surely seems interesting as it references the Success string in the binary. To disassemble, we need to move the cursor prompt to main using s main and then disassemble the code using pdf
See how the address changes in the cursor to point to the main address
Disassembling using pdf command gives the following output:
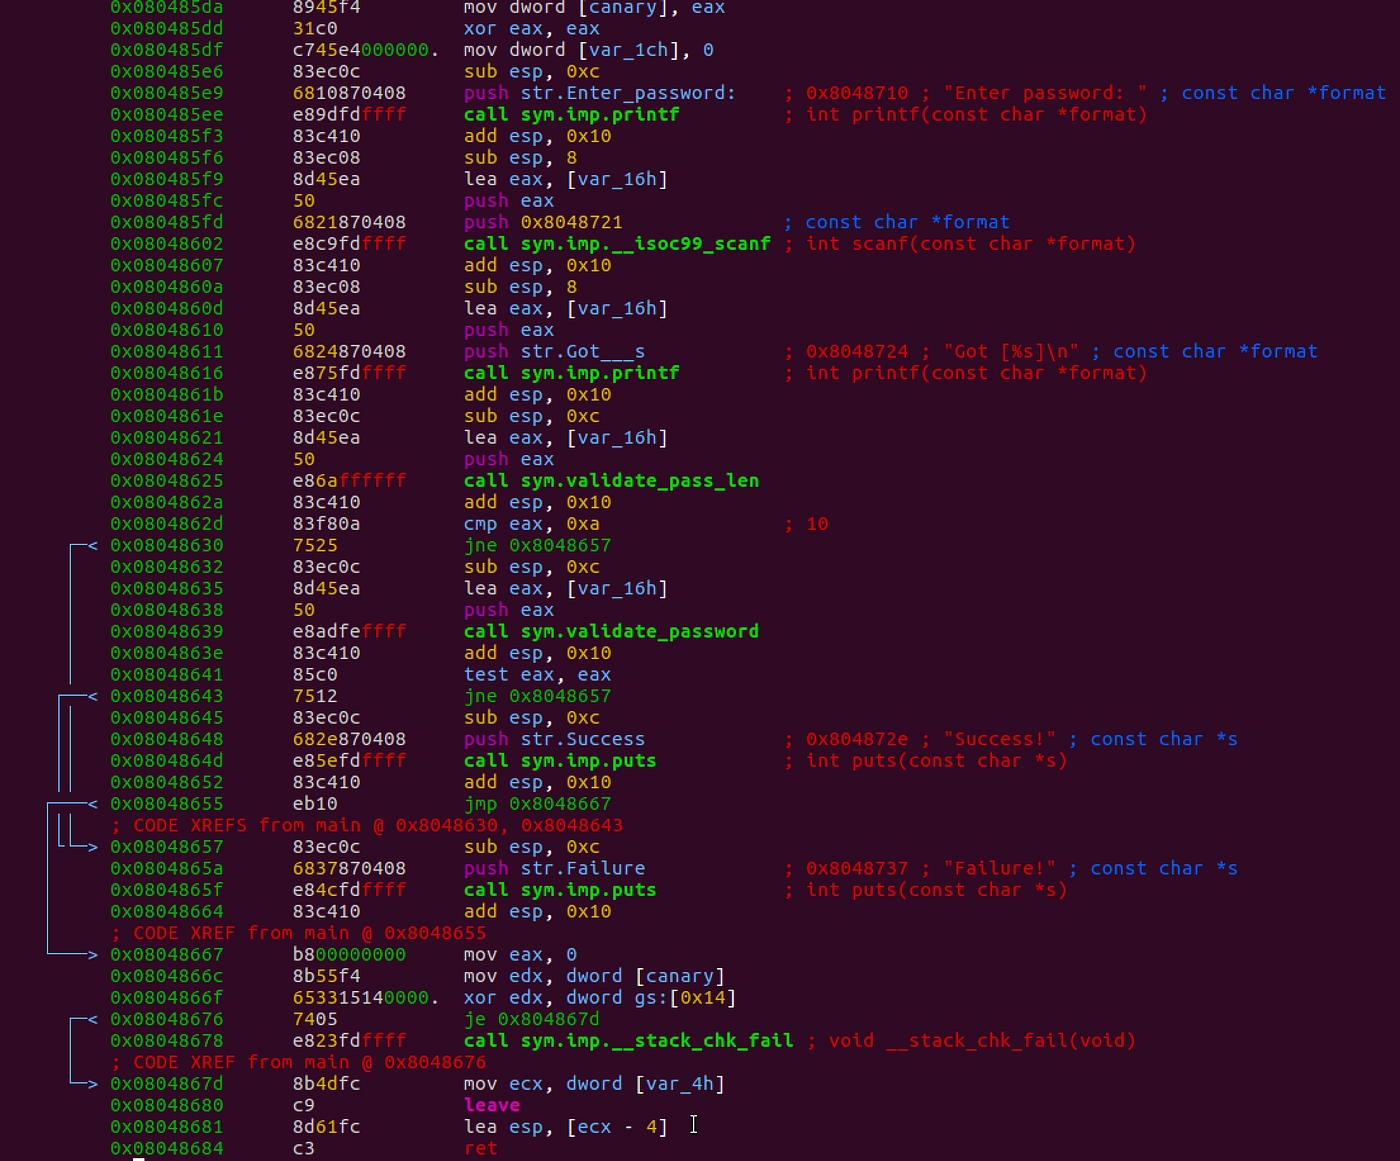
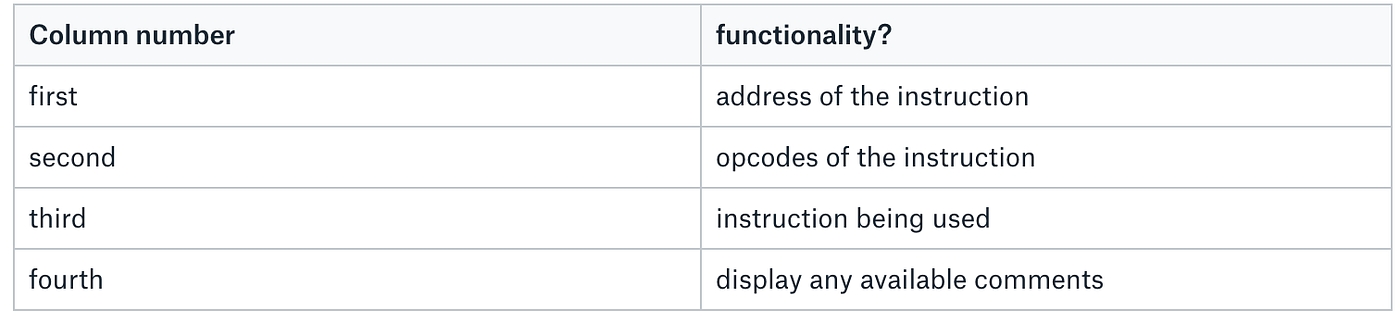
This command shows each column and why it is present. The arrow marks and their direction depicts the jumps bein taken in the code.
Step 5
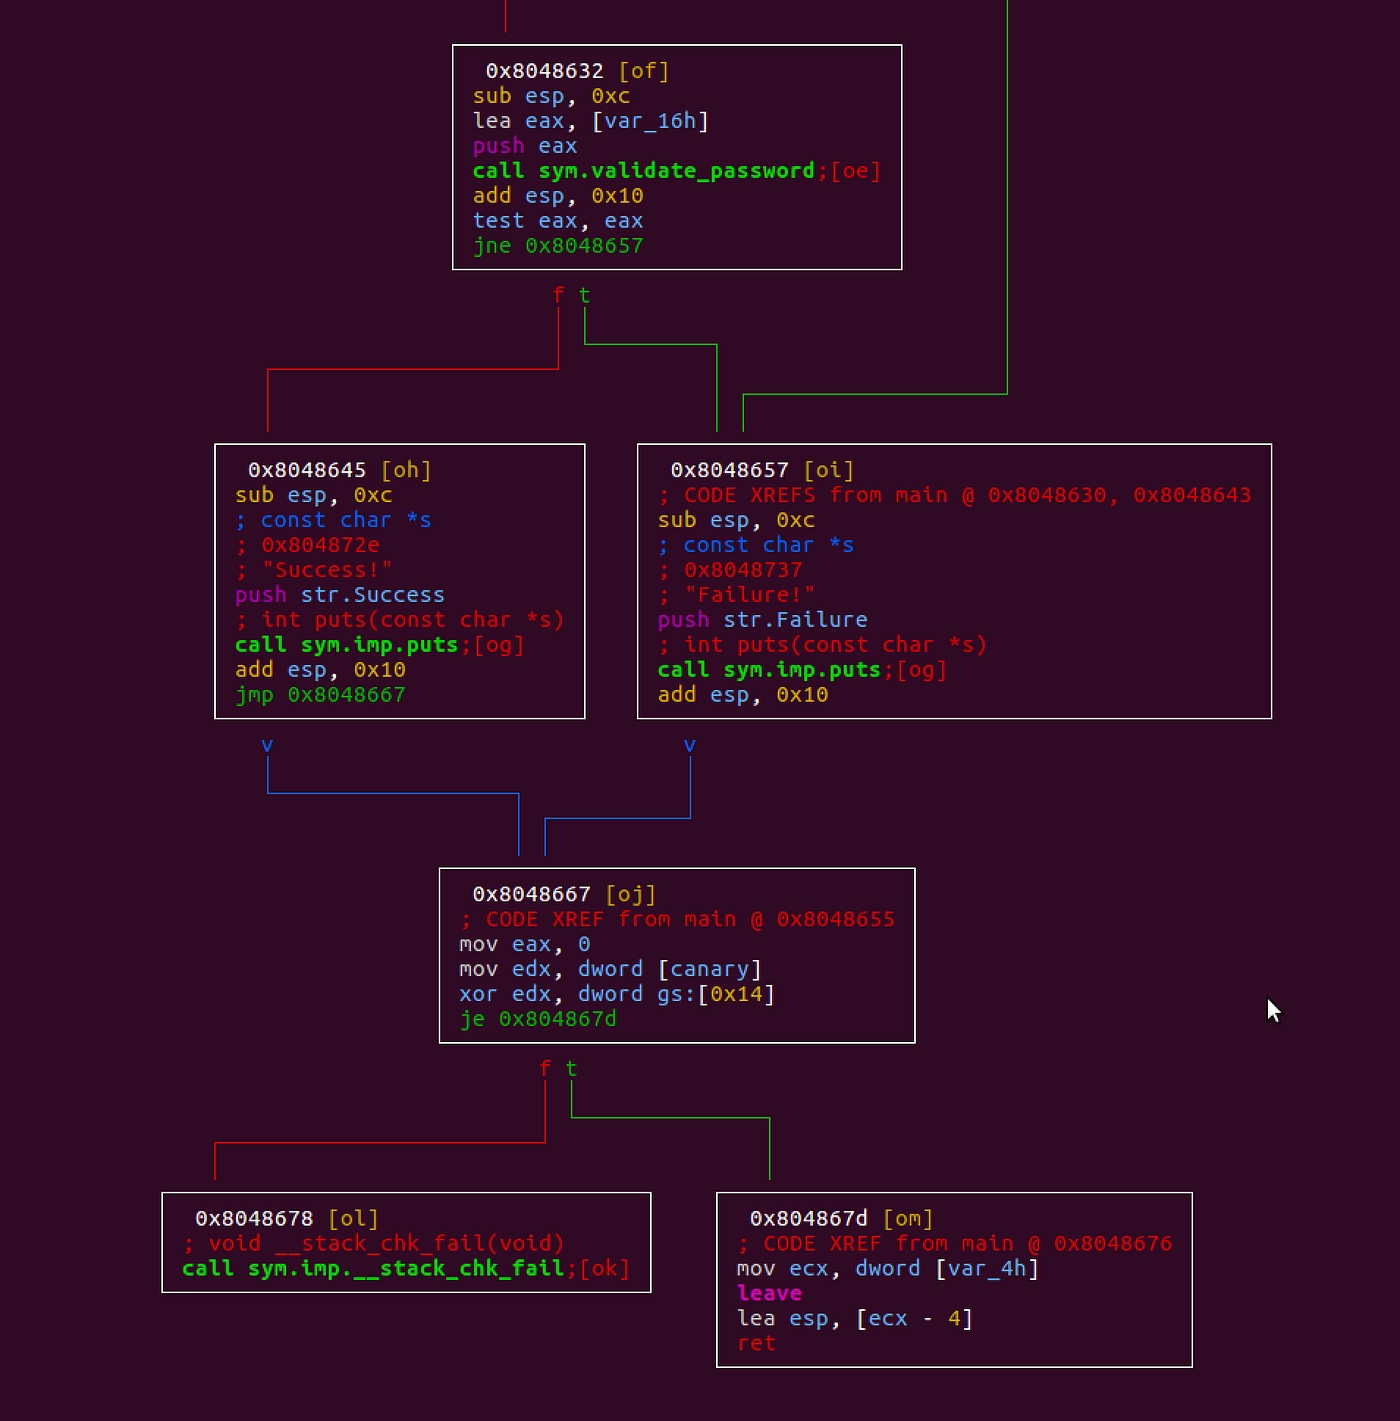
Now, let’s try to look into the main function using the visual mode. To get to the visual mode use VVV command.
You can see the path taken for the code on Success and Failure. The function sym.validate_password which we found earlier, seems interesting. It looks like this is where the password is being validated before printing the Success or Failure string.
You can use up or down arrows to navigate through a large graph.
I typically use the command q to come out of visual mode or to switch the hex mode. The visual mode looks like so:
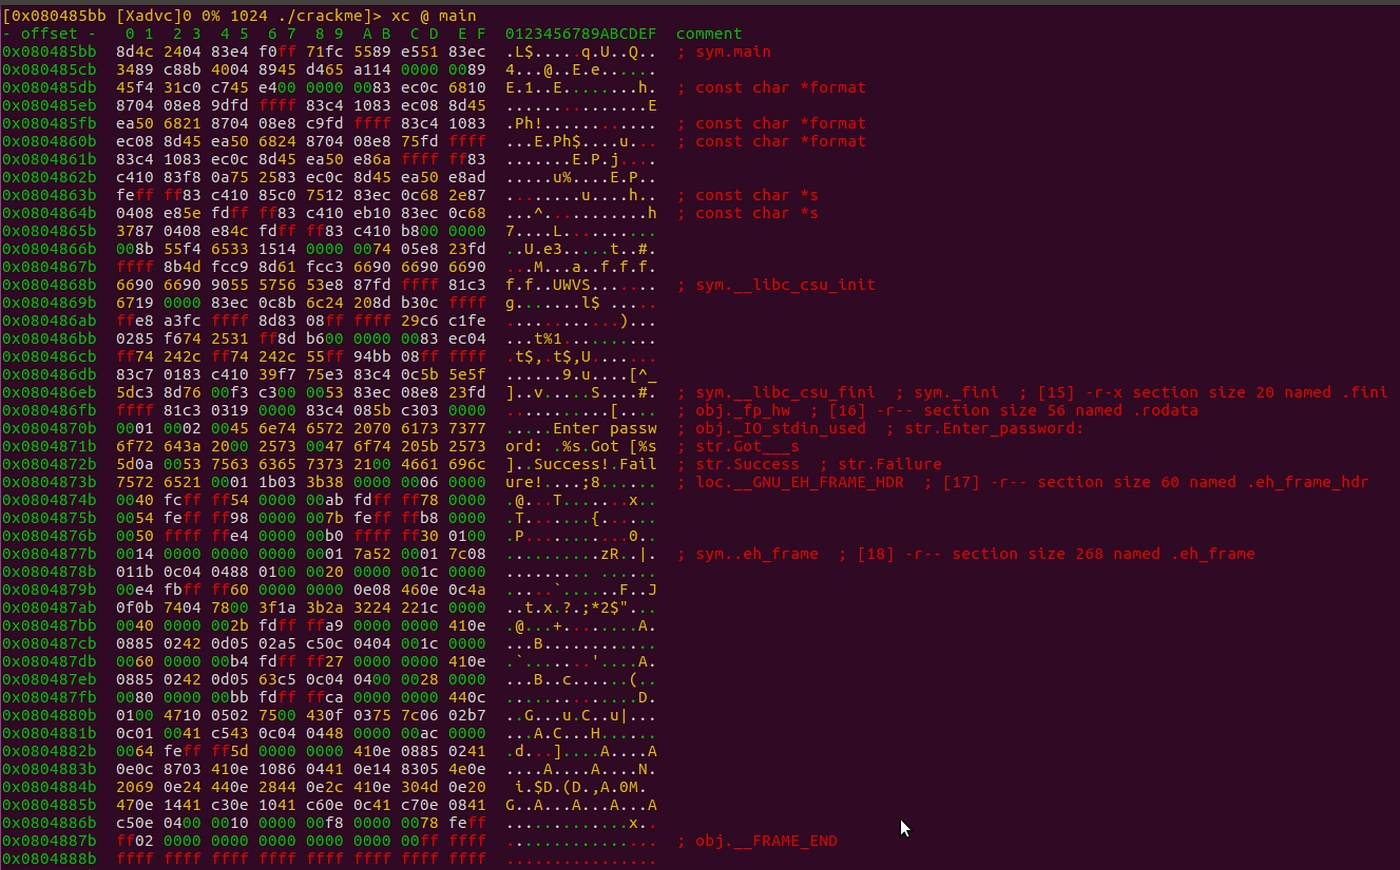
To manage comments and data conversion use C command. You can define a range of program's bytes to be interpreted as either code, binary data, or string. There are many commands to change the metadata as below:
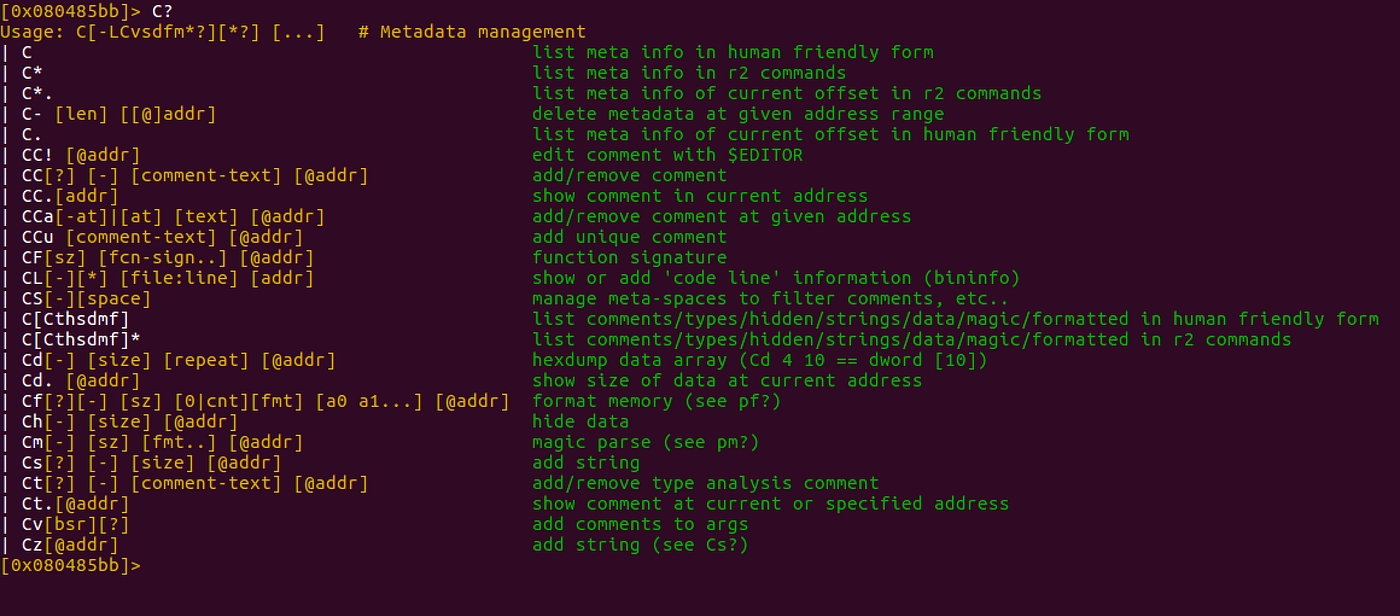
To add a comment to a particular line/address you can use Ca command
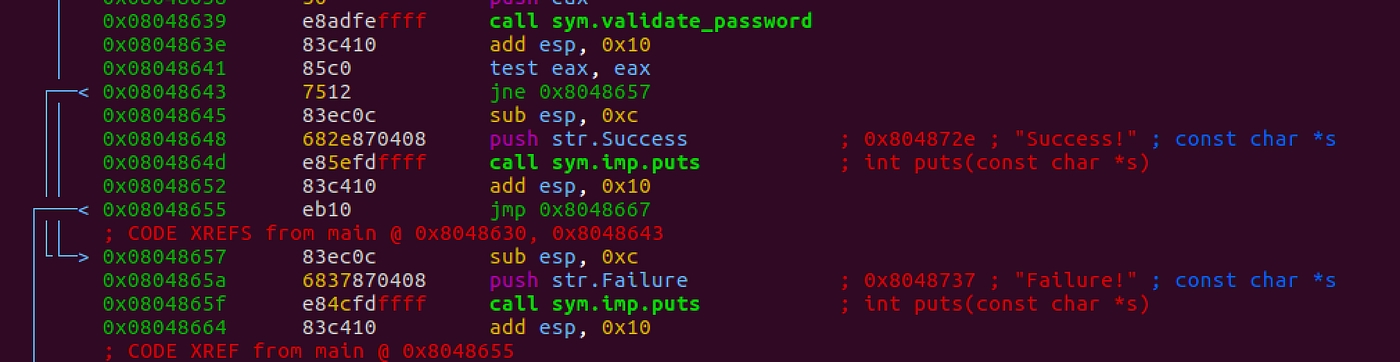
The interesting piece of code seems to be where the decisions are taken on Success or Failure as below. test eax,eax validates if the return value is zero if not we have a jne instruction to print “Failure”.
Step 6
The function sym.validate_password seems like the fun place where all the password validation is happening. Let’s try to disassemble using the commands we learned in the previous steps:
s sym.validate_passwordpdfVVV
Step 3 gives us the visual mode, which is usually my favorite. In the visual mode you can see string of validations a function is doing. This string of validation looks like so:
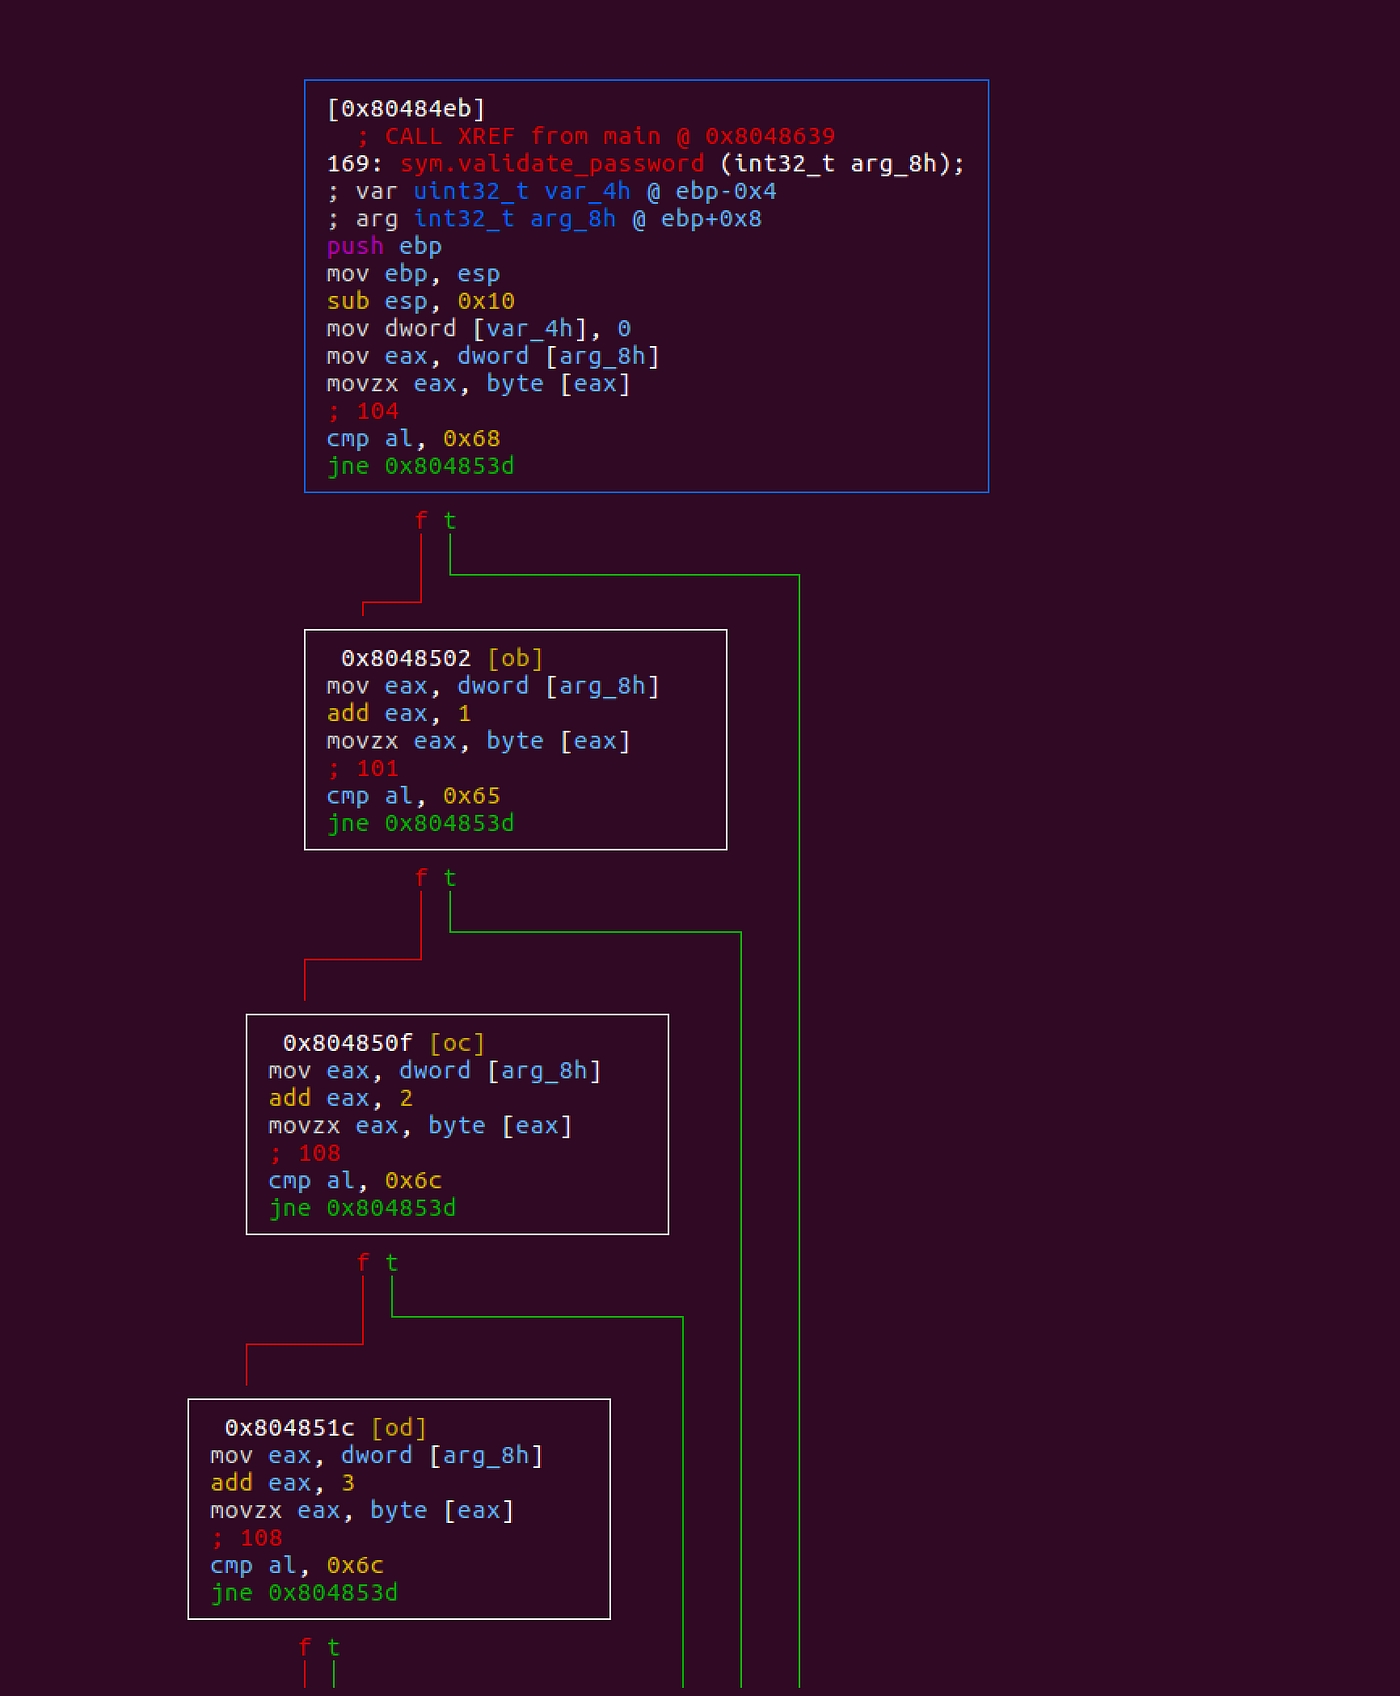
Notice the cmp al, <value> — here the binary compares every time al register with a hex value and if the comparison succeeds we proceed, else we continue.
Let’s try noting all the hex values the comparisons are made against. You can either use a hex chart like this or a python library to convert hex to the character. Now, if we trace the code down, we can see that the password being compared against is helloworld .
Let’s try running the binary with this password. Voila! it works🎉
Conclusion
We have only scratched the surface with this quickstart tutorial. However, Radare is a Swiss army knife for reversing binaries. It can also do patching, dynamic analysis, etc.
There are tons of variations in disassembling binaries and a lot to learn. Reversing binary is a creative art. Every time I use a dissembler tool I learn something new 😺
Source: https://itnext.io/radare2-for-reverse-engineering-part1-eedf0a47b5cc
Last updated